Wednesday, December 21, 2011

Tis the Season

Christmas is just 4 days away!  Most of my shopping is done and I am just left with wrapping.  I have several last minute packages set to arrive in the next few days.  Thank goodness for the internet!  I am always amazed at how excited I am to decorate for Christmas and can't imagine ever wanting to take it all down and put it away.  But, it seems I have already hit the point this year where I am ready for the clutter to be out of my home and I'm really looking forward to freshening it up for spring.  I have a running list in my head of new year's resolutions for my home and I can't wait to get going on it!  My boys get out of school at noon today for 2 1/2 weeks.  I don't have any child care lined up for them other than their Meemaw a few days so I will be juggling them and work. Hopefully they will have enough electronics to keep them busy so I can do what I need to do.  But I am also hopeful that maybe I can get some organizing projects knocked out over the coming weeks since I will be spending quite a bit of time at home with them.  Fingerscrossed.  The older they get, the more they get in to, believe it or not.  Sometimes it's a challenge to work on any type of project with them around because they want to be right there "helping" me.  


Anyway, I'll leave you with this cookie recipe since it is our family's favorite and we just made a big batch on Sunday to give to the neighbors.  Enjoy and MERRY CHRISTMAS!!!


 Kitchen Sink Cookies
 Martha Stewart Living, September 1999


Even though the ingredient list may seem about as long as a grocery shopping list, they're simple to make. In fact, these cookies are so basic you can mix everything by hand; this helps to avoid overbeating, which may toughen the dough.
Yield Makes about 4 dozen


Ingredients

  • 1 cup (2 sticks) unsalted butter, softened
  • 1/2 cup sugar
  • 1/2 cup firmly packed light-brown sugar
  • 2 large eggs
  • 1 teaspoon pure vanilla extract
  • 2 cups all-purpose flour
  • 1 teaspoon baking soda
  • 1/2 teaspoon baking powder
  • 1/2 teaspoon salt
  • 2 cups old-fashioned rolled oats
  • 2 cups semisweet chocolate chips
  • 1 cup sweetened flake coconut
  • 1 cup raisins ( I omit)
  • 1 cup coarsely chopped walnuts ( I use pecans)

Directions

  1. Preheat oven to 350 degrees. Line baking sheets with Silpat baking mats or parchment paper.
  2. In a large bowl with a wooden spoon, beat butter, sugar and brown sugar together until smooth and creamy, about 2 minutes. Beat in eggs, one at a time, until well blended. Stir in vanilla.
  3. In a medium bowl, sift together flour, baking soda, baking powder and salt. Gradually stir into butter mixture until well blended. Add oats, chips, coconut, raisins, and walnuts, and stir until well blended.
  4. Drop batter by heaping tablespoons or with a 1 ounce ice-cream scoop onto silpat about 2 inches apart. Press tops down with the bottom of a glass to flatten cookies evenly. Bake until golden, about 16 to 18 minutes. Cool on pan for 2 minutes. Remove from pan, and finish cooling completely on wire rack.

Friday, December 9, 2011

The Living House at Christmas

 Christmas 2011
The most notable thing about the pictures you are about to see is that I had the house to myself for 3. whole. hours. on a Saturday morning (this never, ever, ever happens!) and was able to actually take them without kids underfoot and Sponge Bob blaring on the TV!

Welcome!
I have not a stitch of red in the entire downstairs of my house and you just can't have Christmas without red!!  My mom bought this plate for me last year and it has served as the inspiration for my Christmas decor.

I filled my hutch with Christmas dishes this year.  Every single one of those plates/dishes was given to me.  This is another one of those times where I started pulling dishes out and realized I had quite a collection!


I'm so much happier with how my tree turned out this year.  Last year, the first ribbon I put on it looked like an ode to Papa Smurf, it was horrible! 

J*O*Y


The lay of the land.  Looking back toward the kitchen and breakfast area.  That's a tired couch and it's missing the red pillow I keep in the middle.  Those aren't my "good" pillows either!  Those are the boys-kick-and-toss-around-the-house-cheap-pillows.  I forgot to put out my "company's coming" down pillows, LOL.  I have grand visions of refurnishing my living room but for now, I have young children and (large) old dogs so the furniture really does serve it's purpose.
Looking from the kitchen to the living area.  Ignore the junk next to the sink!  I didn't take a picture of my nativity set but you can see it behind the poinsettia.   It's the Willow Tree set and I purchased it for myself.  It took me 5 years to collect all of the pieces and I love that I didn't just run out and buy it all at once. 

The buffet in the dining room.  My mother-in-law gave me all of these Mikasa candy dishes and votive holders.  I didn't realize I had so many until I pulled them out last year.  Didn't take a picture of my table. It was still Christmas decor central at that moment.

A blurry picture of the mantle at night - fire aglow.

Greenery and gold ribbon in the entry with an angel to greet you at the door. Since this picture was taken I swapped out the ribbon and beefed up the bows.  Last year I put up a tree in the entry where that chest is with all of my Lenox ornaments that my mom has given me each year since I got married.  This year I used that tree upstairs in the playroom with all of the boys' ornaments on it.  I would love to start doing a fresh tree in the entry.  Maybe next year.

The front entry at night.  (A little blurry, sorry)

My mom and I decorated these wreaths last year.  We had put gold bows on them but this year I retied them and added red and green striped ribbon over the gold.  I love how it turned out and it looks great with the red and green striped cushions on my wicker furniture.


 All is merry and bright...

Merry Christmas from our home to yours!

Wednesday, October 19, 2011

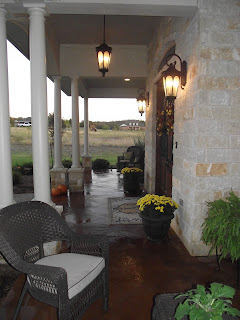
Front Porch - Lanterns: Before and After

 This was my front porch last October.  This picture was taken in the morning so it looks a little washed out but it was pretty sad back then.  I ended up having to re-select all of my exterior lights/lanterns because of a defect with the finish.  We went through 2 sets on our driveway posts that turned from dark bronze to white in a matter of months. 
 Last year I didn't have much furniture on my front porch and it was a beautiful fall and I hated not having somewhere to really sit and enjoy it. 
 These plastic chairs were all that I had for seating.  Pretty sad, right??  All in due time...
 I reselected my lanterns a few months ago.  I was really limited with my options because I had to use the same company and I was really trying to stay away from any sort of layered finish that wouldn't hold up.  I like these so much better than what I had!  They almost look black but they are actually bronze.  I'm hoping that if they do fade, they will at least read more brown and not go to white like the ones before.  My painter said that he could coat them in polyuerethane to seal the finish.  I've never heard of that before and if that's the case, why wouldn't the manufacturer seal them when they are made?!?!  They are going outside and should hold up better to the elements.  Time will tell with these. (Also, my pumpkins are uneven.  One got sent to school with my 2nd grader yesterday!)
 Now I have two wicker rocking chairs on this side.  Still could use some more plants and color over here.  That's a spring project!  I had to return two of my ferns that died (love Lowe's return policy!) so it looks a bit bare.
 I would love a rug over here to punch up the color.  Another spring project.  Those tan cushions reverse to a red/green stripe that will look great with my Christmas decor.  I found all of that furniture at Big Lots.  I never even think to go in there but I saw it in a commercial on tv last April, fell in love, and drove my hubby's pickup right over and bought it and brought it home.  I've had that little fountain for several years.  I put a fresh coat of paint on it this year.  It kind of blends into the rock though.  Maybe next year I should put a darker color on it so it contrasts a little, what do you think?
A view across the porch to the other side.
A plant shot.  Those ferns seem to like it on this side.  They have lasted through the crazy hot summer we had.  That green plant in the pot is a yellow gerbera daisy with no blooms at the moment.  I got those green/yellow houndstooth pillows at Lowe's for $2.50 ea on clearance!  I need to find a print in some darker fall colors to punch it up a little.

So that's my front porch - then, now and ever evolving!

Thursday, October 6, 2011

A few entry pictures and a "what would you do?"

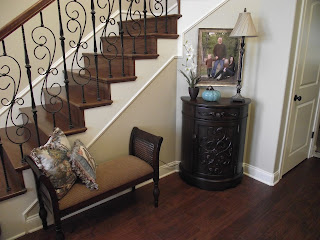
Hello there!  I'm really going to try to blog at least once a week.  Eventually I'll take you on a tour of the whole house so let's start with the entry, shall we?  These pictures don't really give the clearest idea of the layout but it's a start.  It's a 2 story entry.  We have 11' ceilings on the first floor and 9' ceilings on the second floor. Yes, that means our framers had to cut every. single. stud. that went into this house, LOL. 

A disclaimer about the pictures.  If you are looking for a blog where all evidence of life is removed before snapping a picture, then move along, you will not find that here.  :)  This is our home and we live here so deal with it!  I will say that these particular pics were taken the morning after cleaning day so it wasn't completely trashed yet.  


 I'm not really a do-it-yourself kind of a girl but I wanted a table for the bottom of the stairs.  I found this one at a shop for $25 and it was stained and scratched up and a mess.  So I sanded it down, spray painted it blue ('my' blue) and rubbed gel stain on it (my 7 year old helped with that part) and voila!  A $30 table.  Recently I got the new Ballard painted furniture line catalog in the mail and laughed at how this piece looks like it was finished by the same people.  I know what brand of spray paint they use and you can buy it at Lowe's!!  Still not sure on the accessory placement.  How 'bout that football in the metal basket?  I like it too!  If you can't beat 'em, join 'em!


Stairs, bench, chest... boring but functional!


 A view into the living room, dining room, kitchen, breakfast room.  Notice the wall of pictures in the archway on the right.  That is my question...


Here is my "what would you do?" question.  When I hung these pictures my inclination was to hang them to line up with the arch, mimicking the width of the closet door directly across.  Mostly this has looked fine to me but recently I came across a picture on the web of a similar space and they had ignored what was overhead and centered the art on the wall.  I believe in that picture there was a console below the painting. Now I am second guessing myself and I can't decide what to do. So, what do you think, what would you do????  I would love to hear your suggestions!

Friday, September 30, 2011

It's a start!

It is still hot in these parts but I *think* we may be leaving the triple digits behind so I'm calling it fall!  After a quick visit to the east coast and experiencing some cooler and rainier temps, I was ready to come home and bust out the pumpkins!  I never did much fall decorating before we moved into this house and this is our second year here.  I collected a few things last year so it was nice to be able just just get out my bins and start decorating.  

Pretty ceramic pumpkins and gourds in the dining room.

 I keep this greenery on my island year round but my mother-in-law gave me that metal planter a few weeks ago so I plopped the plants in it and added a rust mum in the middle.  Those candlesticks were on my mantle but I swapped them with the wooden pair that I usually keep on the island.
 A glass leaf my mom just gave me.
 I don't think I purchased a single thing on this table.  It was either won at Bunco or given to me by my mom or mom in law. 
And finally the mantle! 

 Still tweaking and adding and working on the outside.  I may even buy some mums this weekend!

Thursday, August 18, 2011

Introduction

Hi. My name is Jana. Now that my children aren't little babies any more, I decided to switch from a mommy blog to a blog about the one member of my family who will never be able to read what I am writing about it...my house! I've been reading mommy blogs for years but it's been only recently that I realized there was a whole world of people who are as house obsessed as I am and like to talk about it!!! Yay for that!!! I only wish I had discovered this other world when we were in the process of building our home 2 years ago. It might have turned out differently. But then again, maybe not. I like to comment on other design blogs but never felt quite right linking to my mommy blog so Less and Bigger was born...

A little about me, I am an interior designer turned mommy and book keeper. I have a degree in interior design and am NCIDQ certified and worked as a full time interior designer for 6 years. Currently I work for our 2 family businesses that are not design related but I have done design work on the side for myself as well as friends and family for the last 7 years. My husband and I have contracted the building of 2 homes ourselves. One was just a practice home and we sold it. The second one we built as a dream home of sorts (I say of sorts because I can dream really big but can't necessarily finance it!)and plan to live here until our children aged 5 and 7 are grown. I have never lived in a home for more than 5 years so this is hard for me to even imagine! The building process and moving can be exhausting but it's like childbirth, you soon forget the pain and are ready to do it all over again! But, hubby says no so I'll just keep decorating, moving things around and dreaming of my first remodel! We hope to put in a pool next summer so that's been keeping me busy.

I chose the name Less and Bigger because it's kind of my unoffical mantra that can be applied to so many situations. I don't like a lot of stuff so I always try to fill my spaces with less and bigger accessories.... When I was planning the design of our home, I didn't want a bunch of small, useless formal rooms, I wanted less and bigger rooms.... When we moved I wanted to move into a bigger house with less stuff so I got rid of a ton.... I live in a smallish city with limited shopping resources for quality home furnishings and antiques and it's easy to want to just buy whatever to fill a space and I'm trying to live by the idea of buying less stuff of a higher quality even if it takes longer to feel like the house is complete. (This is hard for me, I want it done now with no empty spaces glaring at me!) There are endless applications but I'll stop there!

We've been in our home now for about 18 months and still I feel a little more settled everyday. Making a house a home is a huge undertaking! I was thinking about this the other day, our cleaning lady comes every 2 weeks and I think every time she comes there is something new or different in our house. Whether I've brought in a piece of furniture or hung drapery or moved something, it's always changing and evolving. I hope to chronicle that evolution on this blog and I hope you'll join me! At the very least, when I comment on a post out there in the blog world I now have a calling card!